Wednesday, November 5, 2014

My final attempt at perfection

Here is my final go at the the Dark Knight Rises Bane mask.
The mask in my last post was my 'Mark II' this here is 'MarkIII'
I modeled the mask in Blender and 3d printed it. Alot of post process work was done and the appropriate molds were made and 'VOILA!'


I AM FINALLY READY TO SELL VERSIONS OF THIS MASK!!
This is me wearing the mask.
3d printed large parts; trying them on

front half before molding

I make big messes

Font pipes

With a drinking hole for a small straw

Finished front half

Bane drinks through straws

Side of mask


Close up. look at the pipe detail.


I made sure the accuracy was right on. This is the 3d model of one of the 'corn cob pipes' (as i call them). These pipes are almost never done right. If you compare to the movie photos you can see mine are probably the most accurate, of the 'replica props'
Look how it matches up to the real Bane mask. Proportions are accurate
Those are just some of the photos.
Stay tuned on my FACEBOOK. Please 'Like' and 'get notifications' for more pics and future projects :)

Tuesday, October 29, 2013

And here is me wearing the mask


Check out my facebook , Graphix Monster for photos of process etc and updates on things i will do with the masks blah blah. hope you enjoy

Sunday, October 20, 2013

The Ultimate Replica Bane Mask

It have finally been completed. Its about time....
Perhaps the most accurate Replica Bane Mask as of yet not recast from the Warner Bros Replica. Months of research and hunting for correct fabrics, photos for reference, and tedious sculpting. Everything hand sculpted except for top ridge 'loom' pipes, they were 3d printed from a model i designed. Real fabric on top of mask as well as military fabric an back corner pieces that look like fishnet... but are not! All pipes are solid, not rubber. Screen accurate color. Thank you for the encouragement everyone! Now lets get you a mask!


Contact my Facebook.... Graphix Monster, 'LIKE' and get updates on progress and future vids and projects :)
Thanks for viewing

Wednesday, September 4, 2013

CX5 or Bust

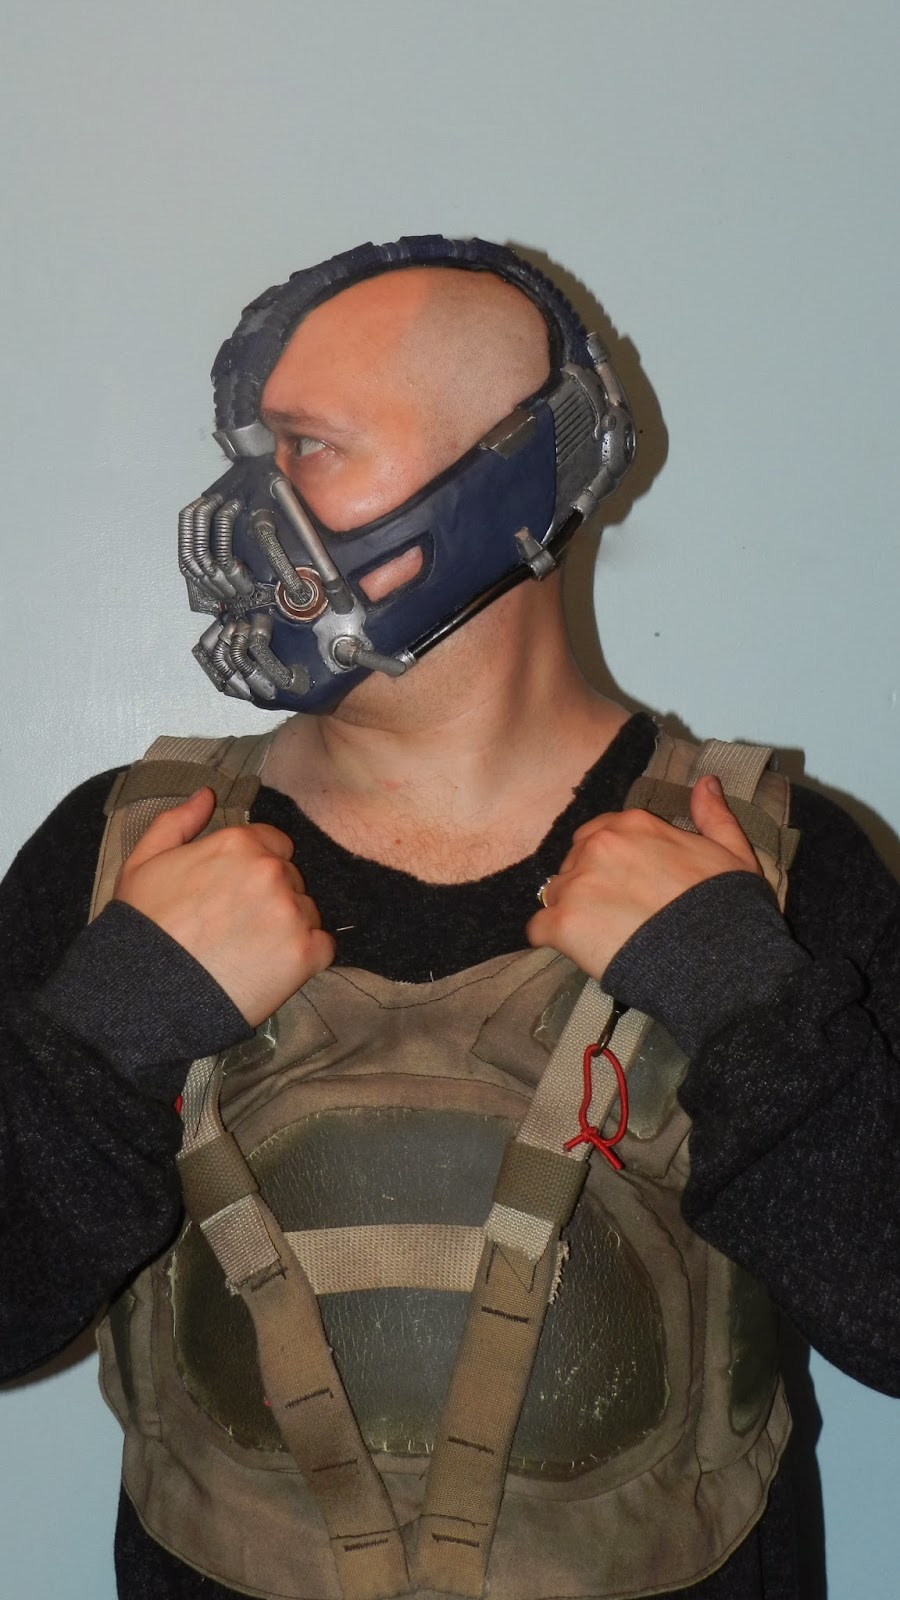
Cx5 did bust.... ALOT!

If I had the photos of the worst moments of my days at work on the mask, they would be of all the snaps and cracks of the parts I had worked hours on.
Cx5 is a great medium for small figures (as it is advertized for) but I think I gave it a test run it could not really stand up too. 
I will use it on a small basis from now on, on pipes and for small detail, not for the large stuff that needs strength. I have decided to go backwards a step to go forward. Sounds very 'Wonkonian' doesnt it?  Being this is my first real prop endeavor, I am always learning, and wont stop till its done!

I have chosen to use Apoxie Sculpt as my weapon of choice. I absolutely love this stuff. Here is a blog , I really appreciate,  that tells of all its awesome properties.

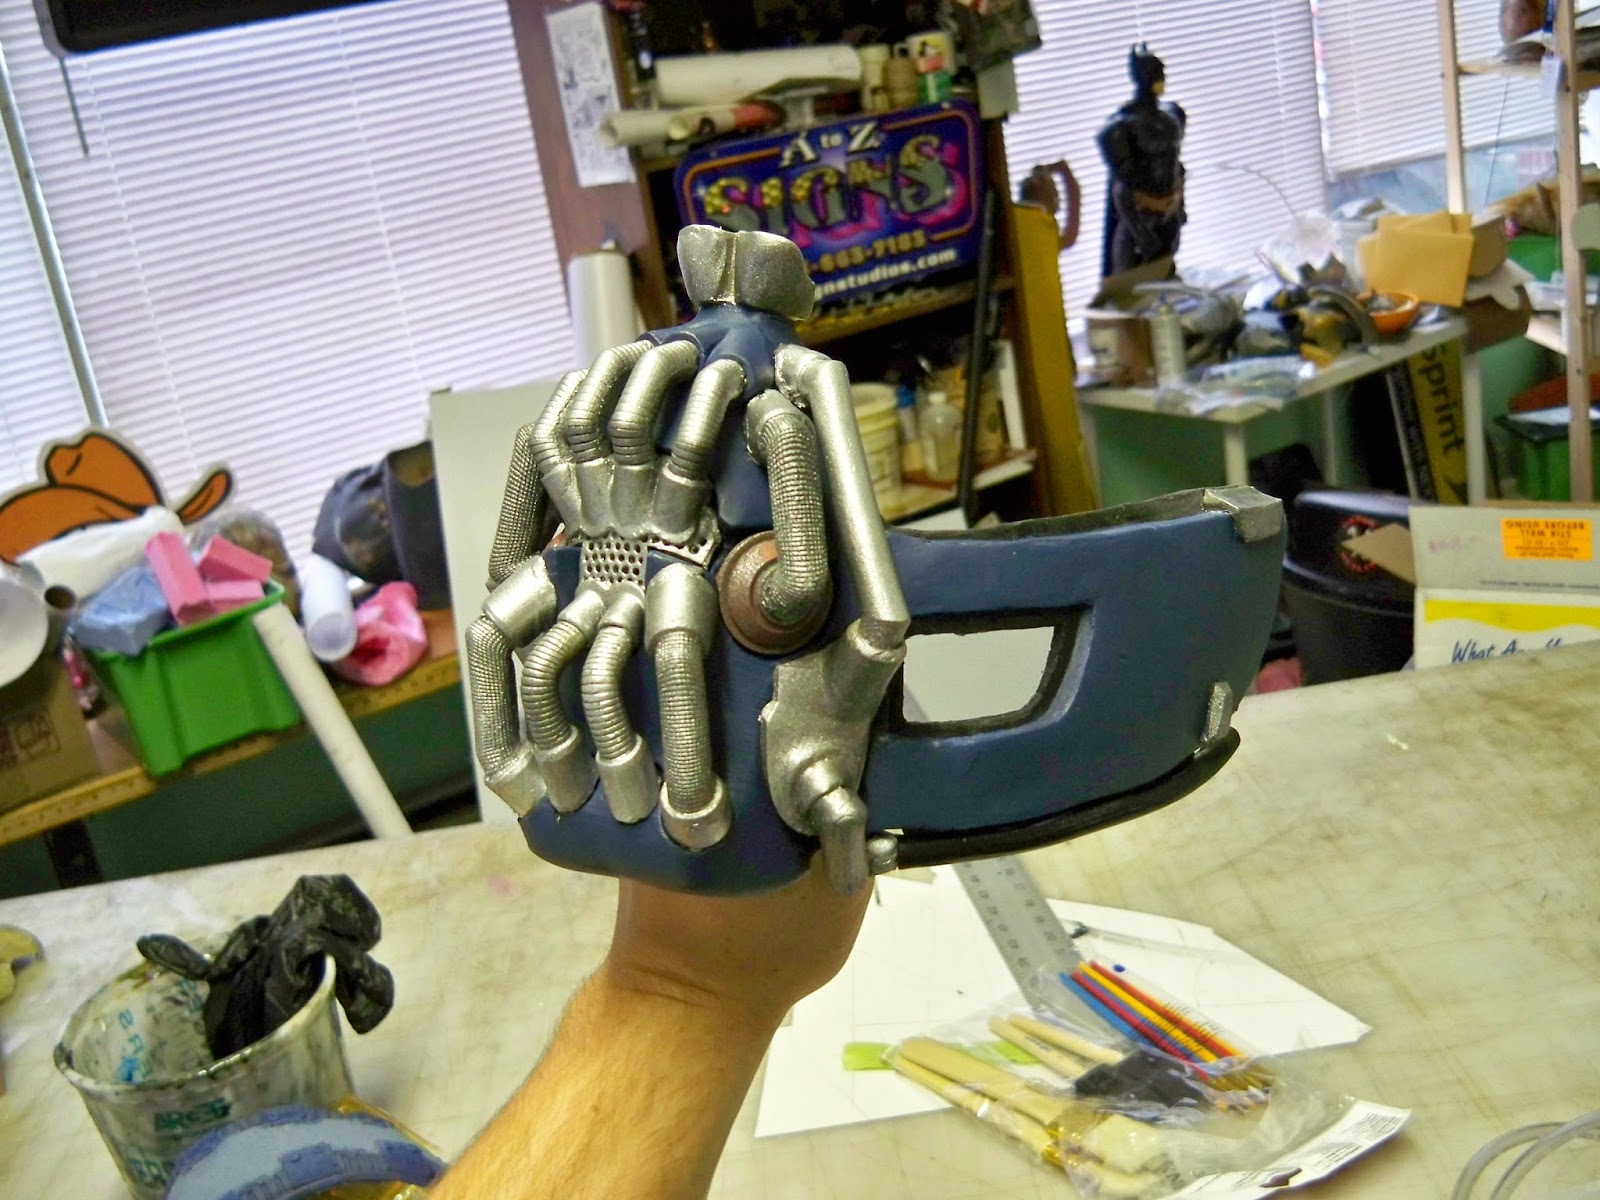
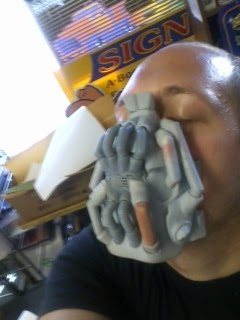
Going back to the sculpt

So the plan is to go back to the sculpt and finalize it alot more. Then, I need to make a mold of that and cast in Apoxie Sculpt (this will be alot more forgiving then the strength of a thin sheet of ice that Cx5 had). 
I already have the road map all planned out.
I am just about to make the mold of this nearly finished sculpt. This will be the underlining structure that will hold all the separate pieces of the mask.


Monday, July 22, 2013

Progress thus far- on our way

DEATH COMES UNEXPECTEDLAAAY!!!
   Since the last post I have been recovering from the 'death' of my personal/work computer which had 3 years worth of my artwork/designs/ etc on it... It was hard to make smooth progress.
NOW I have an external hard drive.. wish I did then. 

THE GOOD, THE BAD & THE UGLY


I went on a quest once again to get some things 3d printed. These are my 3d models..
This is the top ridge piece of the mask. Because it was just not something you could find in the natural world that looked quite right.

Here is an accurate rendition at the side pipes on the bane mask.

 After a couple of weeks I got the prints back.. I was pretty disappointed.


Here is the side pipe.. all the detail got completely shaved off. Material and print method have factors in this process.

BUT  I have a machinist friend who 'knurled' (now thats a million dollar word) a couple pipes for me which i will fabricate the pipes like I did before.
This is the front pipe I had 3d printed.

Here is a scuplt I did for the front pipe,the print came out pretty crappy and I also found where my digital sculpt lacked and I made up for the problems.
 The ONE piece I was happy with was the ridge piece.. I made a mold of it and cast it out of various materials, rubber and a hardening epoxy putty.


Here is the sculpt with the epoxy ridge piece resting on top.
 Here is some progress on the back
the new vs the old. almost done attaching and detailing the piece.

 The back of the mask is ready to be molded and cast in CX5.
Sorry for the wait.. now that I have posted this I will have an easier time posting further progress.